
Essential Supply List & Setup Guide for Starting a Freshwater Aquarium
Starting a freshwater aquarium is an exciting journey — but one that requires careful planning and the right tools. Whether you’re building a peaceful community tank or a lush planted scape, having the correct supplies from day one is the key to long-term success.
From filtration and lighting to substrates, water conditioners, and testing kits, each item plays a role in creating a stable, healthy environment for your fish and plants. Skipping or mismatching gear can lead to algae blooms, stressed fish, and endless headaches.
In this guide, we’ll walk you through a complete checklist of must-have supplies, explain what each item does, and offer setup tips to ensure your first freshwater tank starts off strong.
- Freshwater Aquarium Supply Checklist
- How to Set Up a Freshwater Aquarium for a Newbie
- How to Cycle a New Fish Tank
- How to Add Fish to a New Aquarium
Freshwater Aquarium Supply Checklist
The most critical, yet often overlooked, task is the planning process. Taking time to plan the habitat before purchasing anything can nearly eliminate future problems.
Key considerations for your plan include: tank size, tank location, type of tank environment (rocky, planted), types of fish, substrate, filtration, lighting, heating, and water circulation.
With these factors in mind, create a detailed plan, write it down, and research the fish species to determine the equipment needed for their ideal environment. Once your plan is complete, you can confidently purchase the necessary supplies, ensuring the correct habitat for your fish.
Here is a list of essential aquarium supplies:
1. The Aquarium
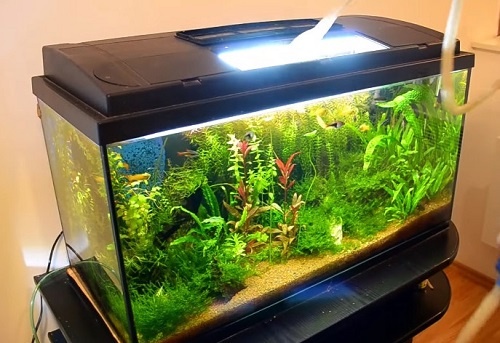
Aquariums come in various sizes and shapes. Silicon-glued frameless glass aquariums are the most popular due to their affordability, durability, and practicality. Frameless aquariums also offer an elegant and decorative appearance.
As tank size increases, thicker glass is required to withstand greater water pressure and occasional mechanical shocks from careless handling. Safety is more important than cost—purchase your aquarium from a reputable dealer.
Contrary to common belief, maintaining a small aquarium is more challenging than a larger one. Establishing a reliable biological balance is harder in small tanks, as they are more sensitive to disturbances like overfeeding, rotting plants, or a dead fish, which can quickly disrupt the tank’s balance. Larger aquariums are more forgiving due to their greater water volume, which provides better biological and chemical stability.
Most fish, especially territorial species like cichlids, thrive and breed better in larger aquariums, where adequate space reduces stress and disease. For this reason, a minimum of 20 gallons is strongly recommended. A 20-gallon aquarium with dimensions of 24 x 12 x 16 inches (length x width x height) is ideal for beginners.
Before buying, research the space requirements of your chosen fish species. For example, South American dwarf cichlids need surprisingly large territories relative to their size, while high-fin fish like angelfish or discus require tanks at least 20 inches tall for comfortable swimming.
2. A Durable Stand
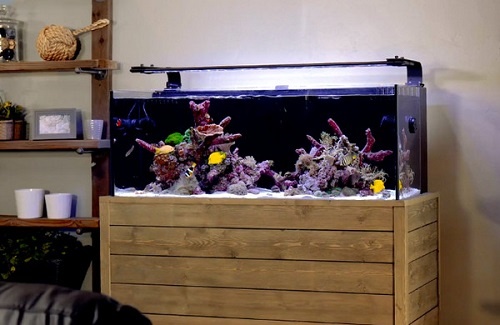
Aquariums are a heavy hobby. A decorated aquarium with sand and rocks weighs approximately 11 pounds per gallon. For example, a 20-gallon aquarium weighs about 220 pounds, while a 100-gallon tank can weigh up to 1,100 pounds. The stand must be stable and robust, with specialized stands required for larger tanks.
Place an elastic material, such as Styrofoam, between the aquarium and stand to absorb mechanical shocks. Styrofoam also acts as a heat insulator, potentially saving electricity.
Choose a location away from direct sunlight to prevent excessive algae growth, which is fueled by light and nutrients like phosphates and nitrates, common in home aquariums. Direct sunlight can also overheat the tank in summer. Positioning the aquarium against a wall helps fish feel secure, as light from all sides can make them feel exposed. Decorating a tank in the middle of a room is challenging unless it is very wide.
Choose a stand here: https://portlandaquarium.net/fish-tank-stand/
3. Hood/Canopy
Aquariums are often sold with a plastic hood and cover to prevent fish from escaping, reduce heat and evaporation loss, and house light fittings. Ensure a condensation cover or tray is placed between the water surface and the hood to prevent condensation from affecting electrical components. A clear plastic hood is preferred for its appearance and ease of setting up LED light fixtures.
Choose a hood here: https://portlandaquarium.net/hood/
4. Lighting System and Timer
Aquarium fish require light to see and be seen, and they respond to light cycles. At night, fish retreat to hiding spots to rest, re-emerging at dawn to feed. Mimicking this light cycle in the aquarium is essential.
Plants need light for photosynthesis. Fortunately, most aquatic plants in nature grow in shaded rivers or pools, so intense light isn’t necessary for freshwater tanks. Marine aquariums, however, require more powerful lighting. Different plants need varying light intensities—Cryptocoryne, Anubias, and Java moss thrive in low light, while Cabomba and red-leaved Alternanthera require strong light. Red-leaved plants generally need higher light intensity.
In reef aquariums, corals rely on symbiotic zooxanthellae (tiny algae) that require light to process waste and obtain trace elements from seawater. Proper lighting is critical for coral health, as failure of the zooxanthellae often leads to coral decline.
A light cycle of 8–10 hours daily is ideal for most home aquariums. A timer ensures consistent daylight periods.
Choose an LED light here: https://portlandaquarium.net/aquarium-led-light/
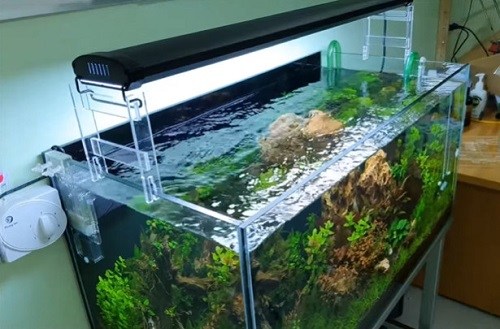
5. Filter and Filter Media
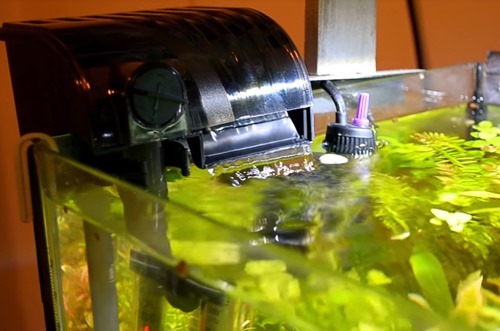
Aquarium filters typically consist of a water pump and a canister through which water flows. Various types, models, and brands are available, including internal filters (placed inside the aquarium) and external filters (placed outside).
External filters are generally advantageous due to their larger canister volume. A filter should be ergonomic, as tedious maintenance can discourage regular upkeep. It must also be durable, quiet, and have secure hose connections for external filters.
With appropriate filter media, three types of filtration are achieved:
- Mechanical Filtration: Removes larger particles to prevent clogging subsequent stages, maximizing efficiency.
- Biological Filtration: Hosts beneficial bacteria that colonize and convert ammonia and nitrites into less harmful nitrates, supporting the nitrogen cycle.
- Chemical Filtration: Typically uses carbon, sometimes with agents for specific toxins (e.g., ammonia). Carbon enhances water clarity and reduces odor.
Choose a filter capable of filtering four times the aquarium’s water volume per hour. For example, a 20-gallon aquarium needs a filter with a flow rate of approximately 80 gallons per hour (GPH).
Read more about aquarium filters: https://portlandaquarium.net/aquarium-filter/
6. Heater and Thermometer

Most tropical fish require stable temperatures between 75°F and 78°F (24–26°C), higher than typical room temperatures. A quality thermostat-heater maintains consistent temperatures. Modern heater technology ensures stable temperatures when using a reputable brand.
Cold-water species, such as goldfish or cardinal fish, prefer cooler temperatures of 60–72°F (16–22°C). Species like paradise fish or peppered cory tolerate a wide range of 60–86°F (15–30°C) and may not need heating. Sensitive species, like discus or blue ram, require temperatures up to 86°F to prevent disease.
At room temperatures of 68–72°F (20–22°C), approximately 1 watt of heating power per liter (or 4W per gallon) is needed to maintain 77°F (25°C). For a 20-gallon aquarium (75 liters), a 75–100W heater is ideal.
Explore aquarium heaters: https://portlandaquarium.net/fish-tank-heater/
7. Substrate
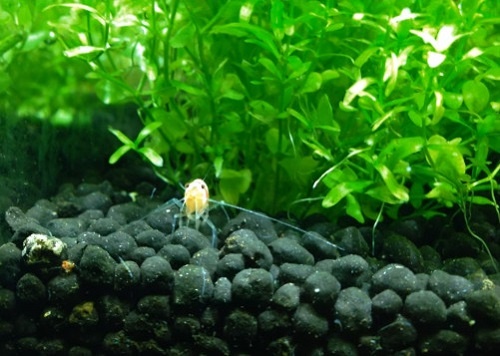
Substrate type and granularity are important for certain fish. For example, South American dwarf cichlids need fine gravel or sand for foraging or nesting. Ensure substrates have no sharp edges, especially for bottom-dwellers, to prevent injury.
Calcareous substrates are unsuitable for soft-water fish or plants, as they harden the water. However, they benefit hard-water species, like Malawi or Tanganyika cichlids, by buffering against undesirable pH drops.
Granule size matters for plants. Cryptocoryne and Vallisneria species prefer fine substrates, while some Echinodorus species thrive in coarser ones. Fine substrates can reduce water circulation and oxygen levels, potentially becoming anaerobic and producing odors unless bottom circulation methods, like undergravel filters, are used.
Find a good substrate for planted tanks: https://portlandaquarium.net/planted-tank-substrate/
8. Decoration
Decorations are a matter of personal choice but look best when kept natural. Use inert materials like sandstone or slate for rocks, as with gravel. Ensure large rock structures are stable to avoid toppling, which could injure fish or damage the tank. Gluing rocks with aquarium sealant can enhance stability. These structures provide shelter for shy or nervous fish in the community.
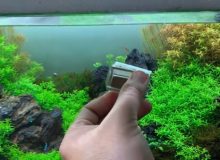
9. Aquarium Test Kits

Regular water testing is essential for maintaining a healthy aquarium. With many test kits available, it can be confusing to choose the right ones and know what to test for.
For a newly set up fish tank, test for at least the following:
- Ammonia and Nitrite Tests: Essential for cycling and ongoing maintenance. If fish show signs of distress and the cause is unclear, check ammonia and nitrite first. In a healthy aquarium, their concentrations should be zero.
- Nitrate Test: Ammonia is converted to nitrite and then nitrate, the end product of the nitrogen cycle, used by plants and algae. Nitrate is relatively non-toxic, but high levels indicate a need for a partial water change.
- pH Test: Determines which fish are compatible with your water without commercial additives and ensures system stability. Regular pH testing is necessary throughout fishkeeping.
More details: https://portlandaquarium.net/water-characteristic-ph-gh-kh/
10. Water Conditioners
Chlorine, added to tap water to kill bacteria, is safe for drinking but lethal to fish if untreated. It can strip the protective coating from fish, increasing vulnerability to bacterial and fungal infections. Heavy metals like copper, lead, and zinc, often present in tap water, are also toxic to tropical fish.
Treating water before adding it to the aquarium is essential. Various products are available: some dechlorinate, others remove heavy metals, and some fully condition the water while adjusting pH.
11. Maintenance Tools
Several tools simplify aquarium maintenance:
- Water Changer/Gravel Cleaner: Facilitates gravel cleaning with a plastic hose and cylinder. Gravel is swirled in the cylinder, dirty water is siphoned into a bucket, and clean gravel remains. Low-voltage gravel vacuums are available but more expensive. More details
- Algae Scraper/Magnet Cleaner: Easily removes algae from aquarium walls, which can then be siphoned out using the water changer. More details
- Buckets and Nets: Useful for water changes, removing debris, or catching fish.
12. Optional Supplies
- Air Pump: Injects air bubbles to enhance oxygenation, prevent dead spots (stagnant water pockets), and remove harmful gases. The visual effect of bubbles is appealing, but the practical benefits are significant. Choose a size based on the features you want to run. Choosing an air pump
- Automatic Fish Feeder: Dispenses the correct amount of food at set intervals, typically mounted at the top of the aquarium. Powered by battery, electricity, or both, it’s ideal for vacations or absences, ensuring fish are fed daily without neglect.
How to Set Up a Freshwater Aquarium for a Newbie
A freshwater aquarium can provide years of enjoyment for you and your fish if established and maintained correctly. Different fish or flora may require special equipment or unique filtration, so setting up the tank correctly is essential for short- and long-term success.
1. Choose a Proper Location for Your Tank
It is best to avoid natural lighting sources in most situations. Natural sunlight coming through windows and patios tends to promote algae growth, which can lead to problems for beginners. Find a medium to dimly lit, cool area with sufficient air circulation for your aquarium.
Ensure you have access to electrical outlets nearby, as easy access to the location is essential for weekly tank maintenance.
2. Place the Tank on the Stand
Measure the length, width, and height of your stand, tank, and canopy as they will be set up. Ensure the chosen location is large enough to accommodate not just the tank and stand, but also any HOB (Hang-On-Back) filters and hoses. Verify that the tank is level and fits squarely on the stand.
Remember that water is very heavy (approximately 8 lbs. per gallon), so it’s critical to have a level, well-supported area for your aquarium. Failure to do so can result in disaster. It is recommended to “test fill” any new aquarium outside to check for leaks.
3. Filtration System Setup
Arrange the filtration components in their final positions as they will be when the tank is running. Ensure there is adequate spacing between the components and the wall. Confirm that everything fits and that there is proper spacing.
4. Plumbing and Electrical Supply
Ensure that your electrical outlets are properly grounded and that any extension cords used are heavy-duty and equipped with a breaker. Use drip loops on all cords coming from the tank to prevent water damage. Check all plumbing fixtures and filtration components to ensure they are properly fastened and sealed.
5. Build an Attractive Aquascape
After thoroughly rinsing the substrate and decorations (do not skip thorough rinsing), you can begin arranging the aquarium’s interior before adding water.
Start with the substrate. Generally, about one pound per gallon is sufficient for a plain aquarium, or 2-3 inches of high-quality substrate (e.g., Fluorite, Eco-Complete, or aquatic soil) if you are using live plants.
Next, add rocks, wood, or plants to decorate the tank. Some fish require hiding spots or caves, so arrange the decor with the needs of your chosen species in mind.
6. Add Water and Test the Filter
Use treated tap water (add a tap water conditioner to the water) to fill your tank, and take your time to avoid disturbing the aquascaping you just completed.
Filling the tank and starting the filters will test whether the plumbing fixtures are functioning properly. It will also show you what your finished aquarium will look like, allowing you to make any necessary adjustments to your aquascaping.
7. Lighting and Other Equipment
Turn on all aquarium lights to ensure all bulbs are working. Keep lights and fixtures away from water splashing from the aquarium or filter.
Most lighting included with tanks is inadequate for a well-lit tank, especially for planted tanks. Your plant selection should be based partly on the amount of light available, as well as the use of CO2 and fertilizers.
Ensure all devices are operating correctly and that water flow is consistent with the needs of your future inhabitants. This is also the time to start your thermometer, air pump, powerheads, or other devices.
How to Cycle a New Fish Tank
Cycling is the most neglected process in fishkeeping and is the primary reason for beginner fish deaths and why some people abandon fishkeeping.
Traditionally, cycling a tank involves adding hardy fish and letting nature take its course. While this is possible, it often shortens the fish’s lifespan or kills them outright. Fishless cycling is easier, prevents harm to fish, and allows you to fully stock your tank once the cycle is complete.
Fishless cycling is simple: add enough ammonia to the tank to raise the level to 5 ppm. Maintain the ammonia level at 5 ppm until the tank can remove all ammonia within a 24-hour period (ammonia level reading 0).
At this point, beneficial bacteria have developed to convert ammonia into nitrites. Nitrites are also harmful to fish, but the next step involves bacteria that convert nitrites into nitrates. Nitrates are less harmful and can be managed through regular water changes.

Aquarium nitrogen cycle
A reliable test kit is essential to determine when your tank has completed the cycle. Be patient—cycling a tank can take one to two months. While it’s a long process, your fish will benefit greatly.
A commercial product that supplements beneficial bacteria can be used to “instantly” cycle a tank. Some aquarists add substrate, decorations, or filter media from an established aquarium to jump-start the cycling process.
More about the process here: https://portlandaquarium.net/nitrogen-cycle/
How to Add Fish to a New Aquarium
If you have properly cycled your tank, you can add a full bio-load of fish right away. If you used the fish-in cycle method, you must add fish sparingly and choose only very hardy species, as they are more likely to survive.
Select specimens that are compatible both behaviorally and environmentally. Avoid overstocking your tank, as too many fish can create hazardous water conditions. For beginners, it’s recommended not to exceed the “1 inch of fish per gallon” rule (based on the adult size of the fish, not their current size).
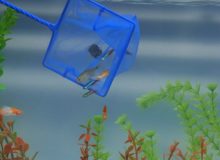
There are several methods for transferring fish from a shipping bag to the aquarium. Dumping fish directly from the bag into the tank is the worst method.
Instead, float the bag in the tank water for 15 minutes, then release the fish into the tank, or net the fish out of the shipping bag and place them into the tank.
Using a quarantine tank is highly recommended, especially for established aquariums.
Starting a new tank is a rewarding experience, but as with any pets, you are responsible for their health. Do your research and plan ahead—you and your fish will be grateful in the long run.
More here: https://portlandaquarium.net/buy-and-acclimate-new-fish/

Thanks Lucas, this guide was very helpful! I am setting up the first aquarium for my kids and want to make sure it’s a success on the first try and this is perfect!
Thanks for your kind words. I’m very happy knowing this article can help beginners.